
N64RGB Installation Guide
This page will guide you through the procedure of installing the N64RGB kit into all compatible versions of the Nintendo 64. This is an extremely cheap and effective method for getting a high quality RGB output.
You can purchase the kit from me here. Currently, PAL systems have no official documentation or support.
Compatibility
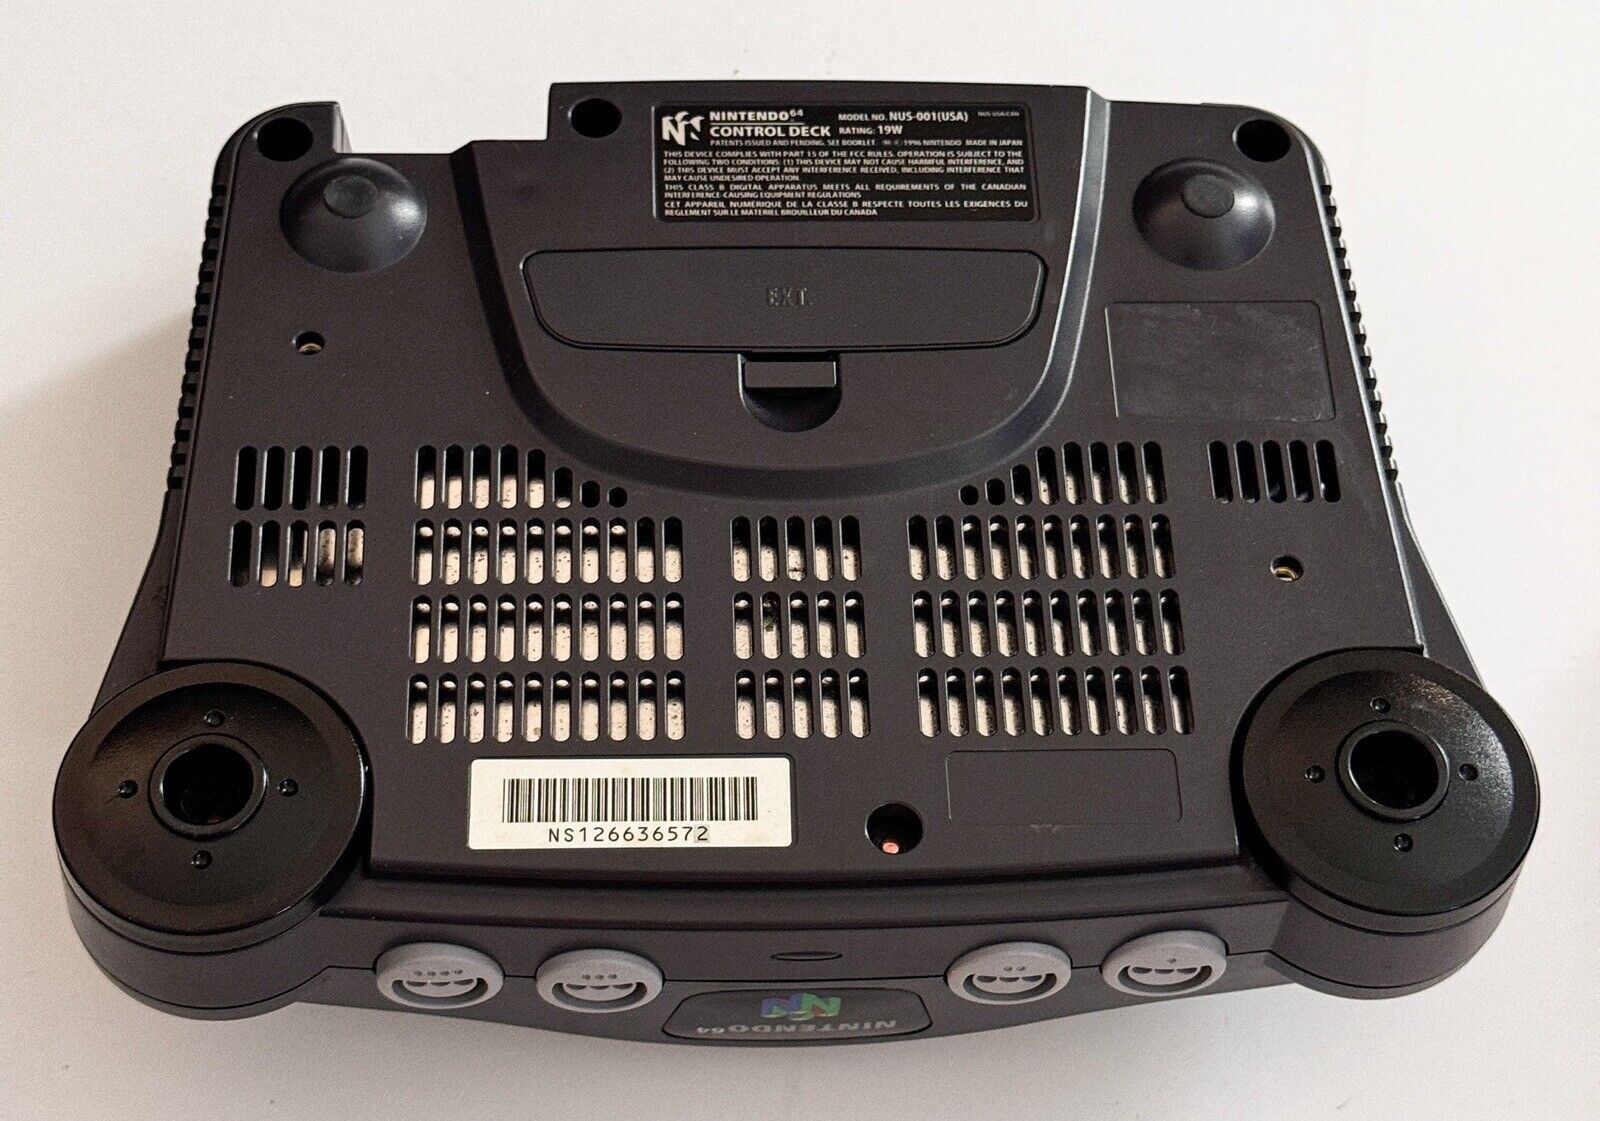
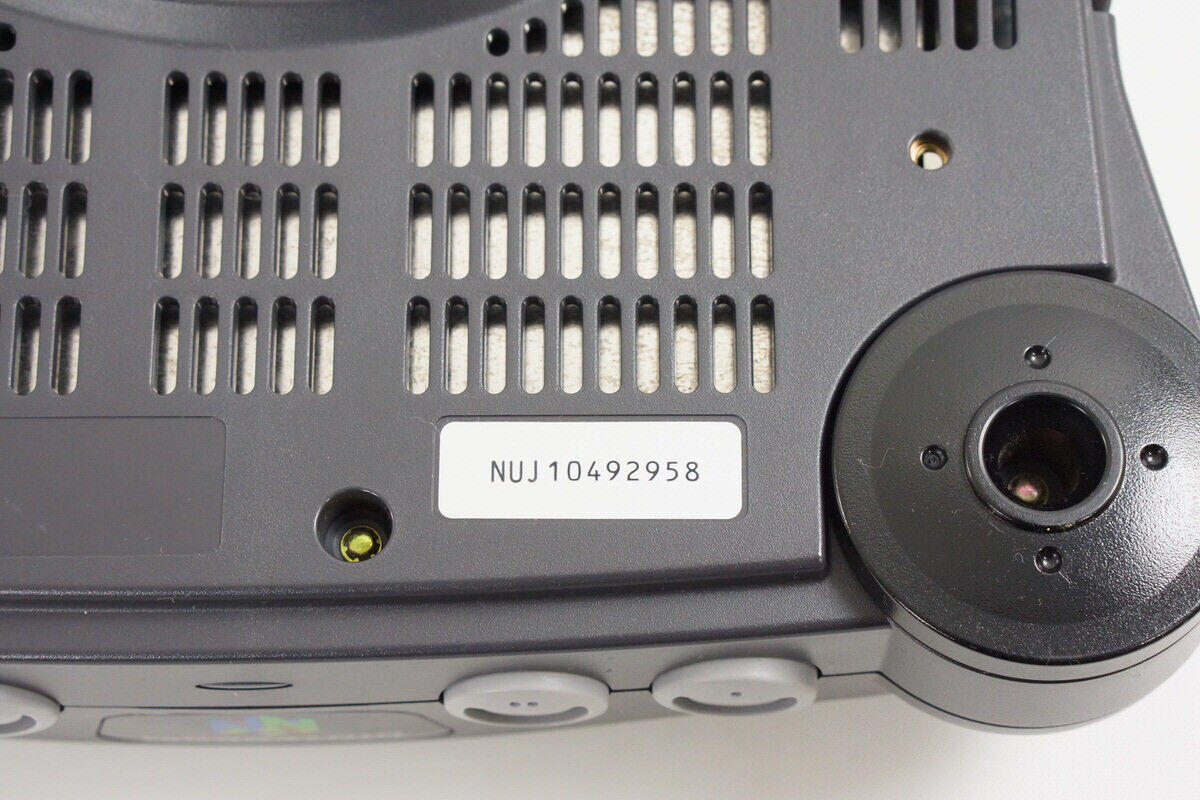
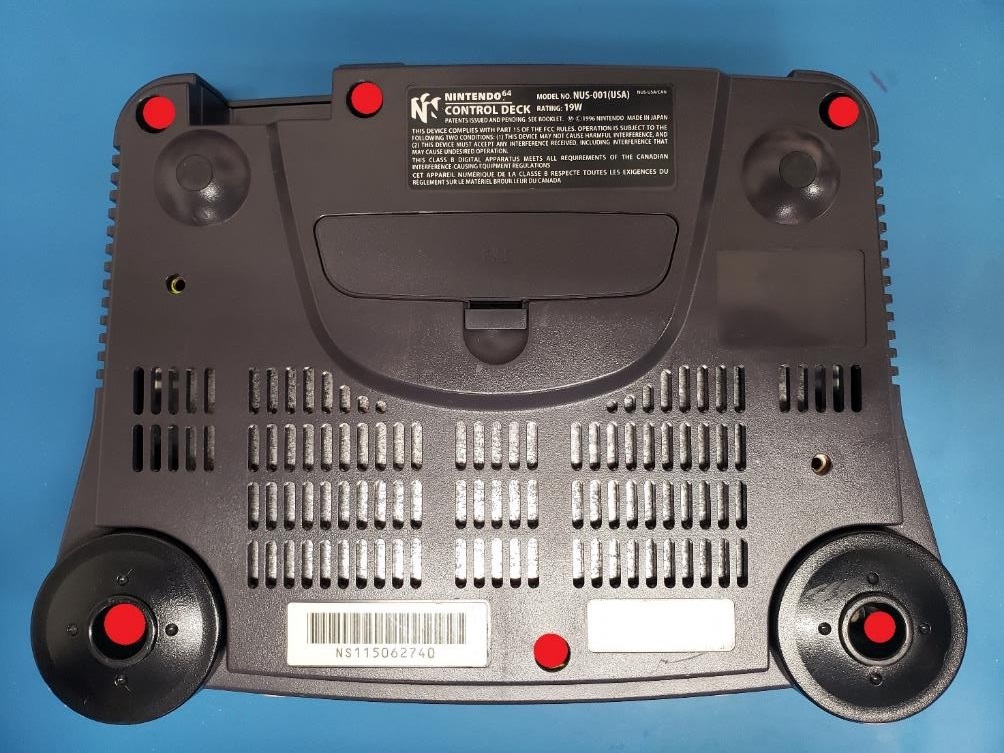
The N64RGB kit is ONLY compatible with Nintendo 64s that have a serial number beginning with “NS1” or “NUJ1”. You will find the serial number on the bottom of your Nintendo 64. See the examples below.
NTSC-U (USA) Console
NS1XXXXXXXX - NTSC-U (USA) ![]()
NTSC-J (JPN) Console
NUJ1XXXXXXX - NTSC-J (JPN) ![]()
Tools Required
- Soldering Station
- Phillips Screwdriver
- 4.5mm Game Security Bit
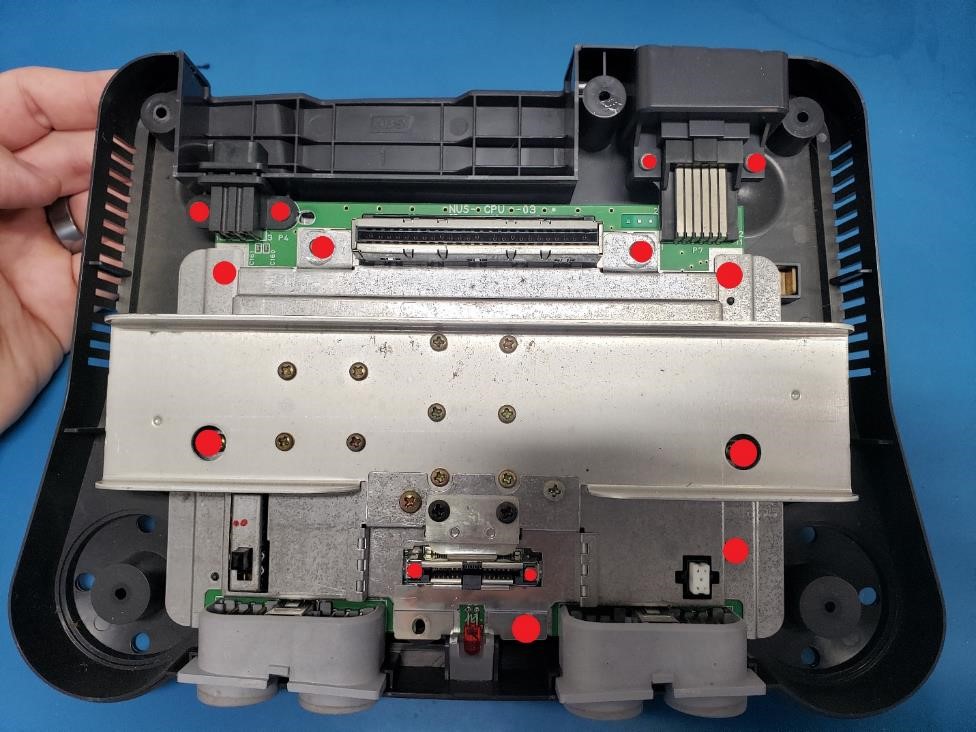
Disassembly
Begin disassembly by removing the jumper/expansion pak from the Nintendo 64.
Using a 4.5mm game security bit, remove the 6 screws from the bottom of the Nintendo 64 & remove the top shell.
Remove the 14 phillips screws that secure the N64 mainboard and remove the PCB.
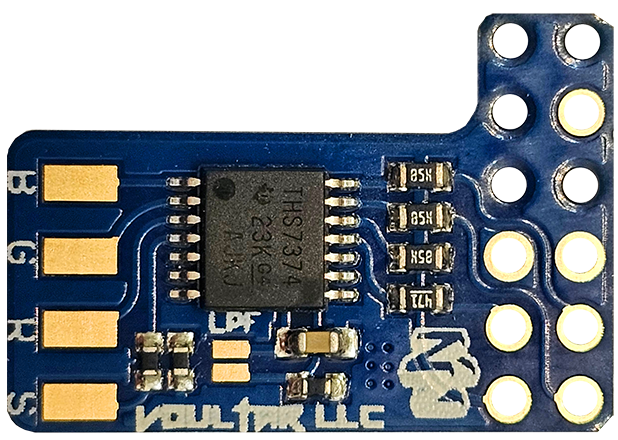
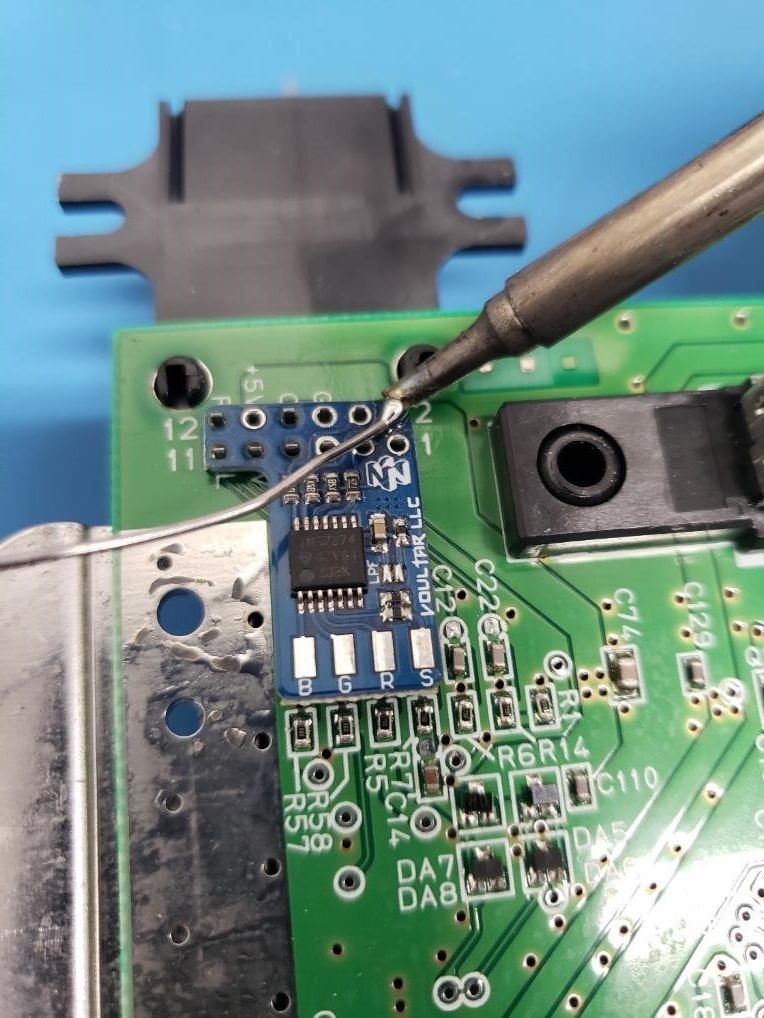
N64RGB Installation
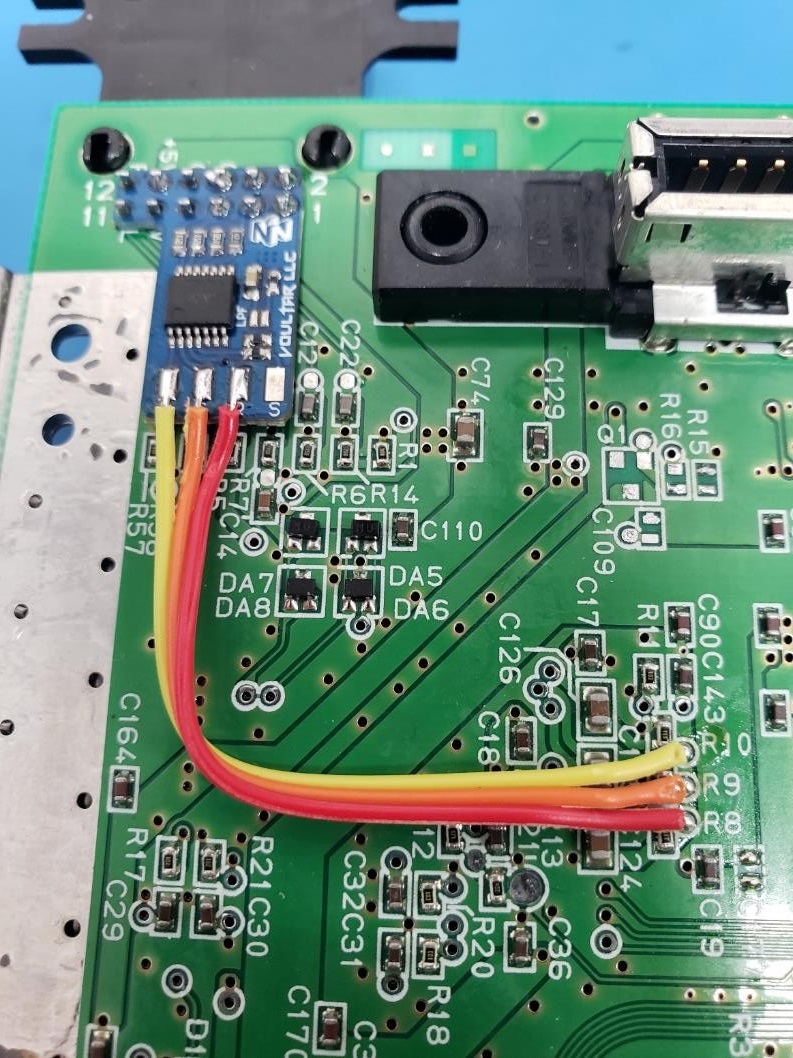
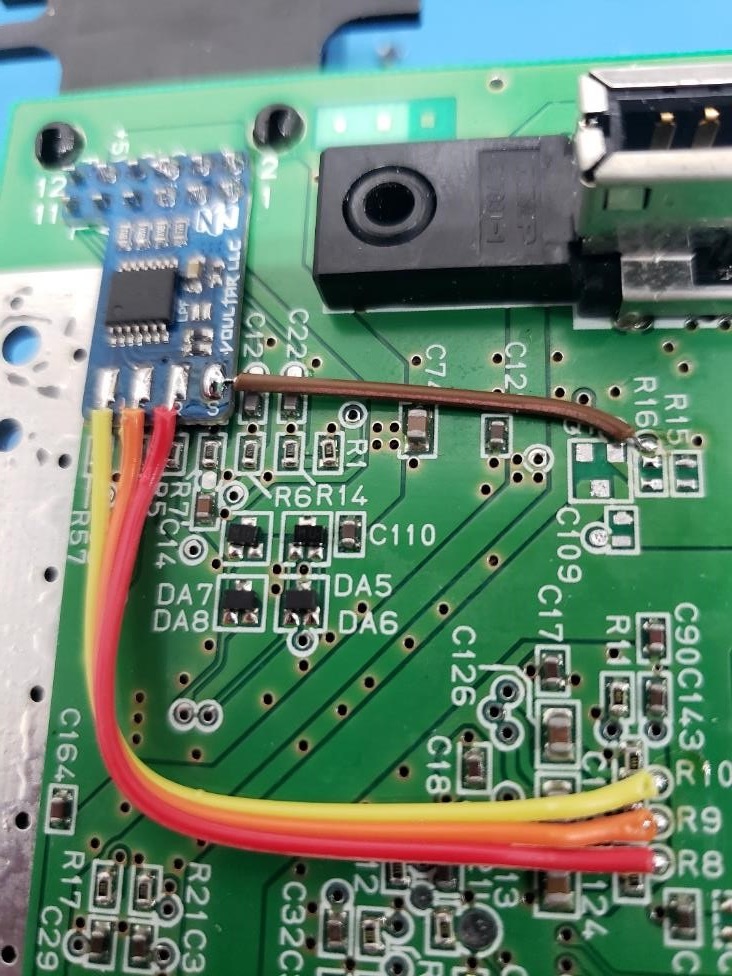
Place the N64RGB kit over the multi-out pins and solder into position.
Wire Preparation
Strip and pre-tin 4 conductors for: c-sync, red, green, and blue.
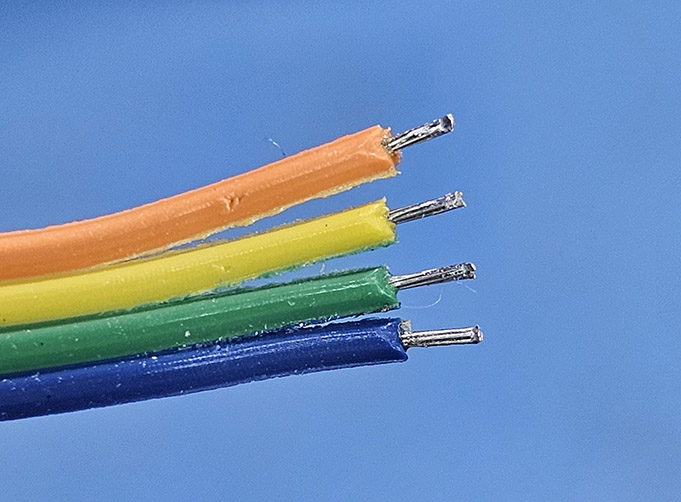
Keep the pre-tinned conductor length no longer than 3mm!
Take 3 of the pre-tinned conductors and solder them into vias R8, R9, and R10.
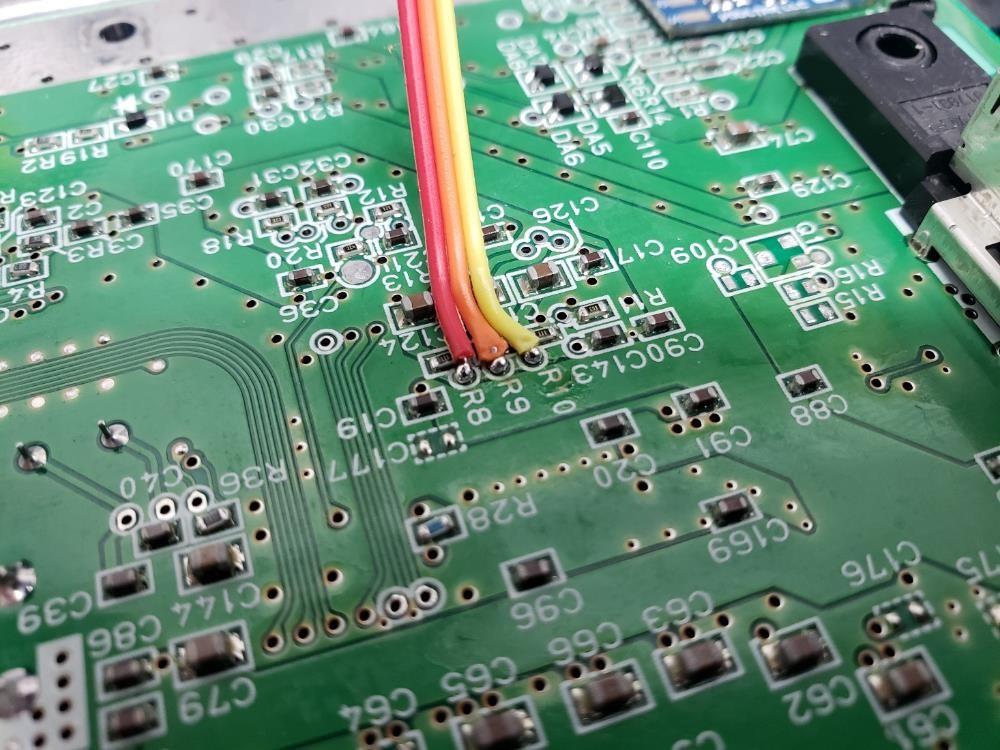
If using supplied ribbon cable, bend ribbon at a 90° angle and cut the excess.
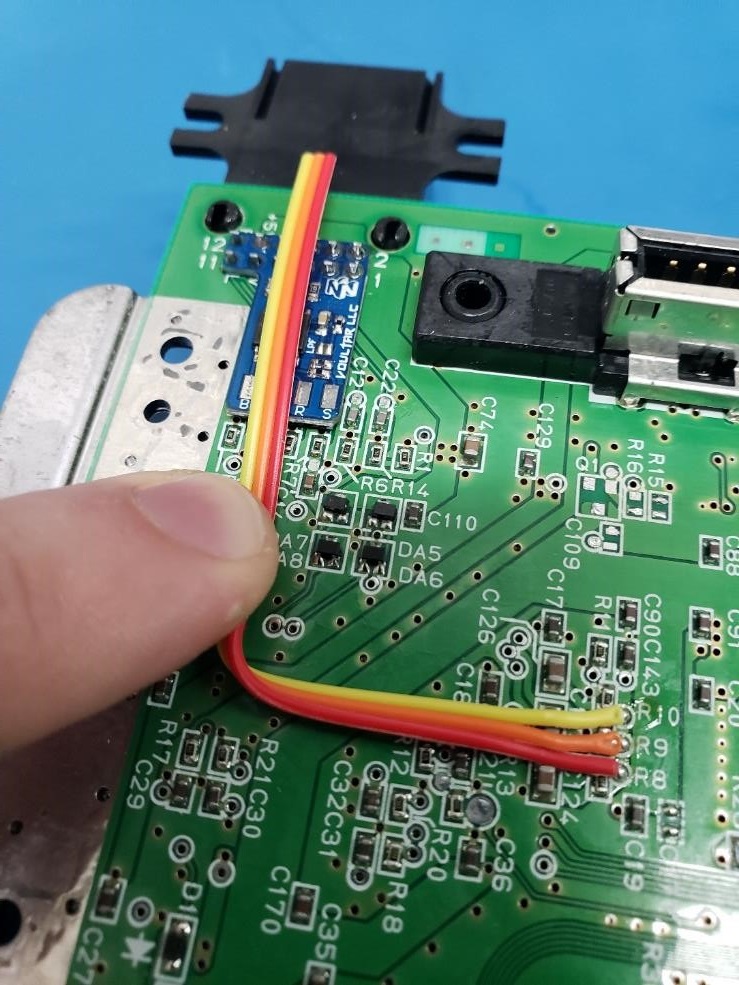
Solder the 3 conductors to the corresponding solder pads on the N64RGB kit:
- R10 = Blue
- R9 = Green
- R8 = Red
The “LPF” jumper on the N64RGB kit will enable a low-pass filter when bridged.
This is useful when the downstream device doesn't properly filter out high frequency content!
Alternate Solder Points
Alternatively, you may solder to the capacitors to the left of the vias (see below).
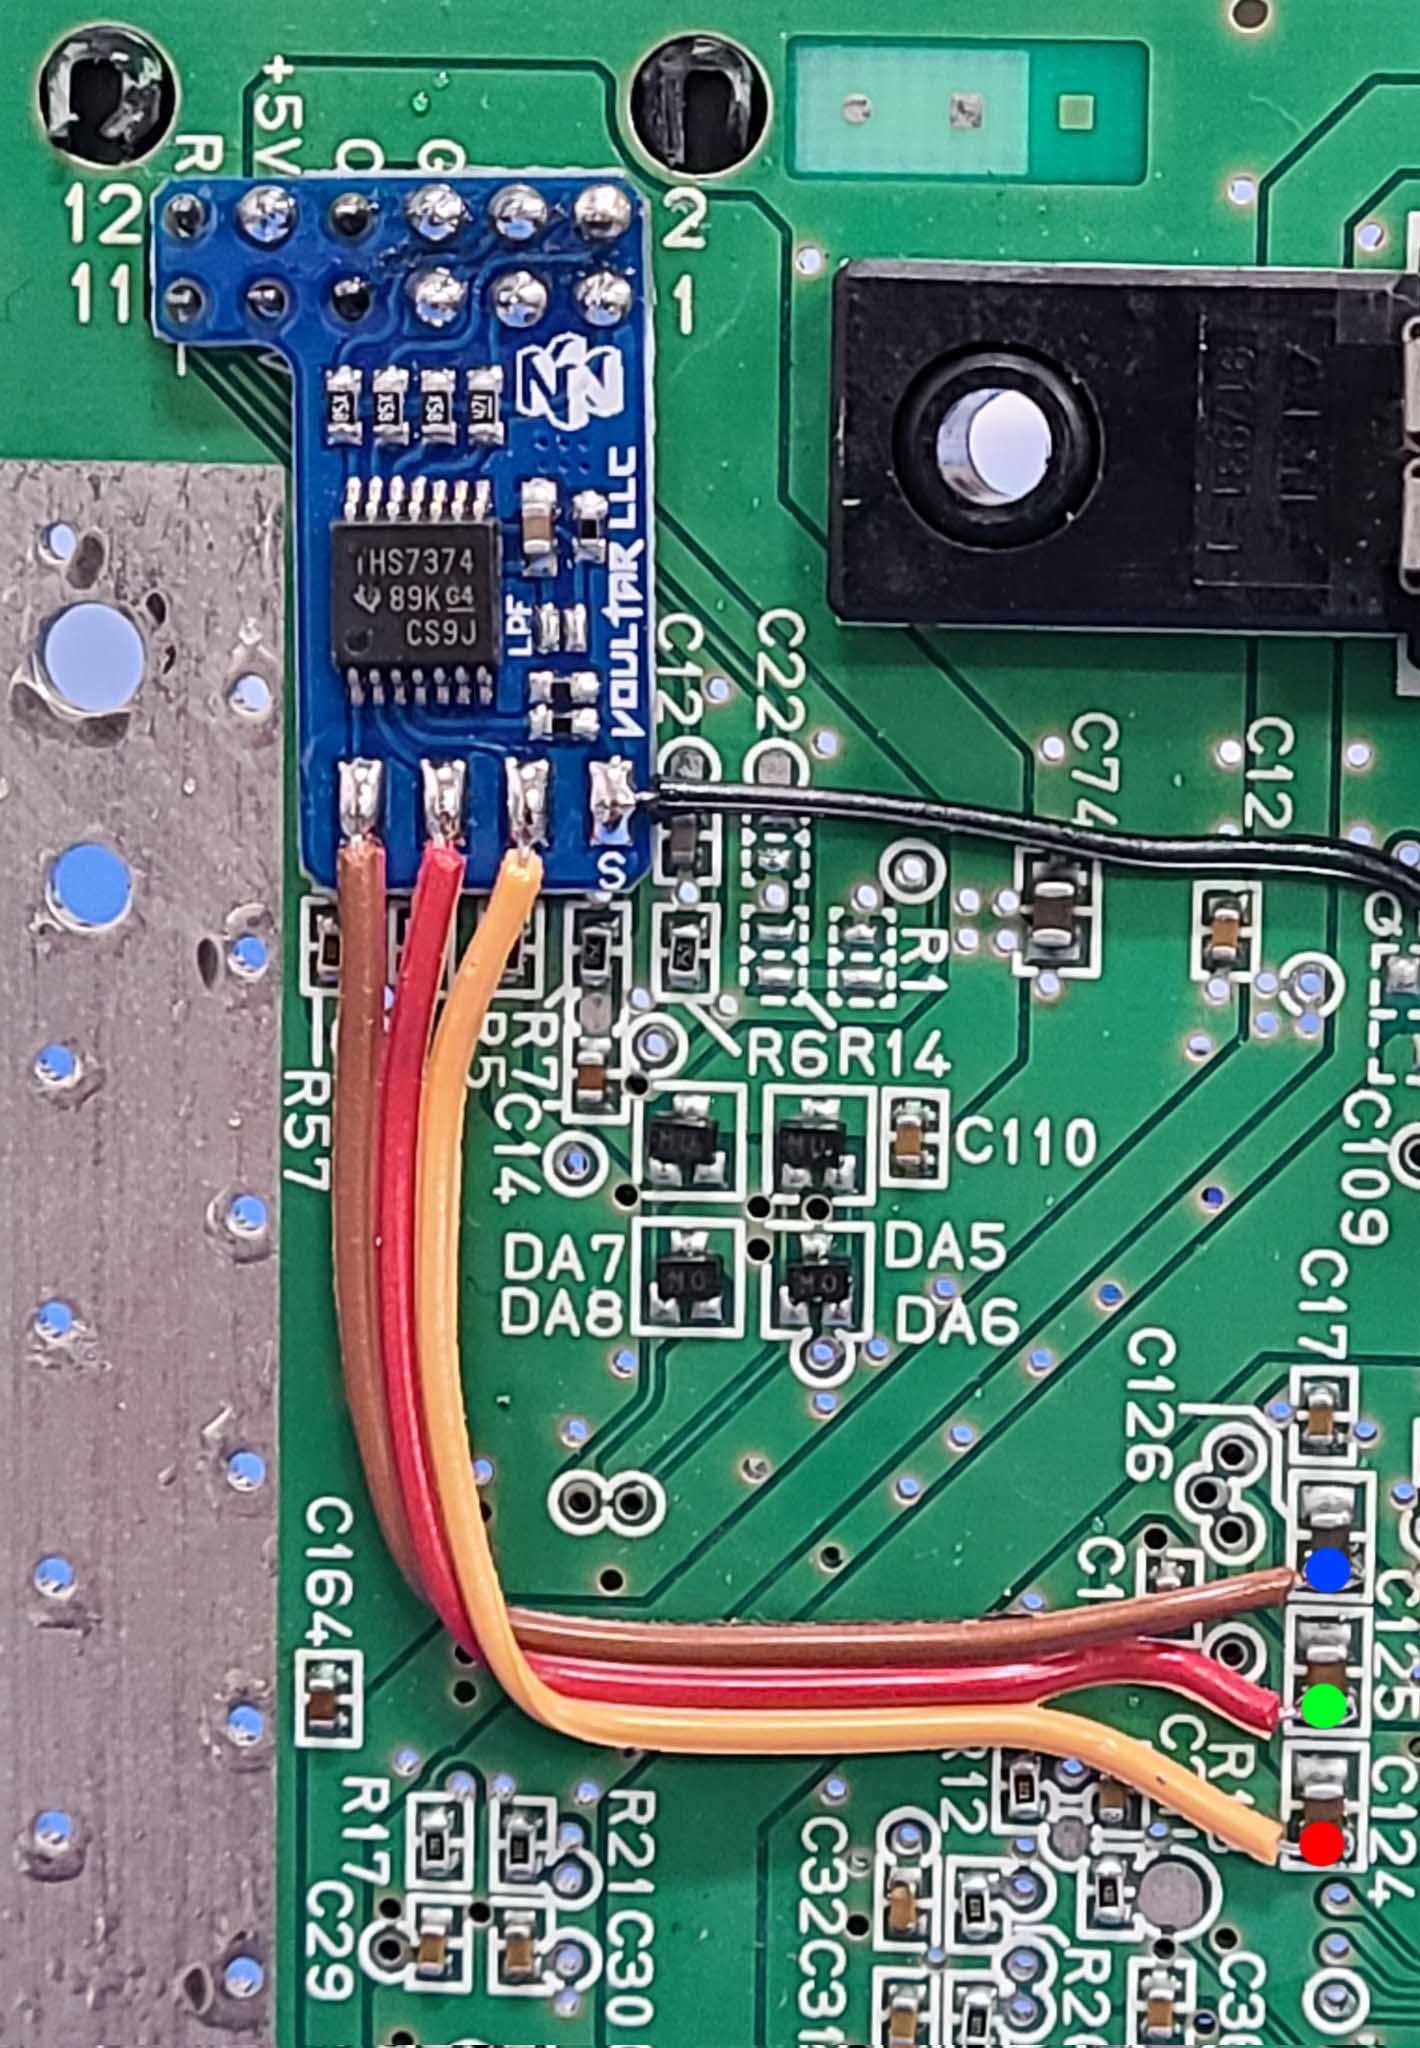
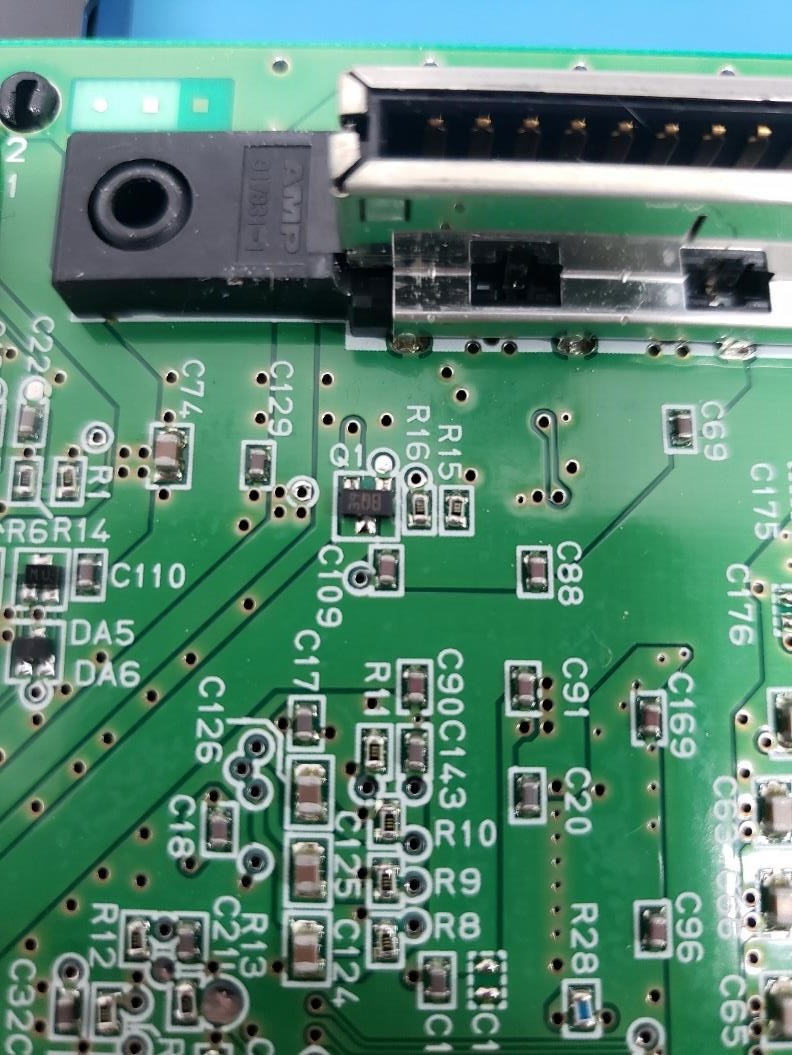
N64 Composite Sync
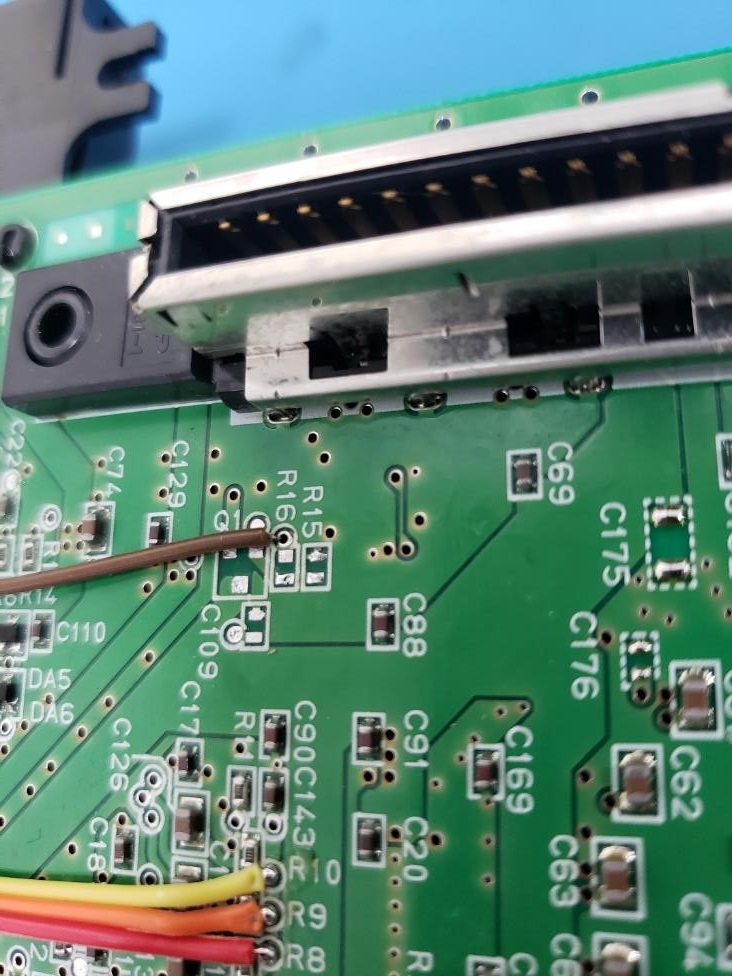
Early Nintendo 64 systems (CPU-02 to CPU-03) drive and buffer C-Sync to the multi-out. If Q1, R16, R15, and C109 are present and you have an appropriate SCART C-Sync cable, it's unnecessary to solder to the C-Sync pad on the N64RGB kit.
This N64 has the components to drive C-Sync. Therefore, no further action should be taken.
If the components are missing, solder a pre-tinned conductor no longer than 3mm into the via under R16.
Finishing Up & Final Steps
Your installation (if buffering C-Sync through the N64RGB kit) should look close to the picture below:
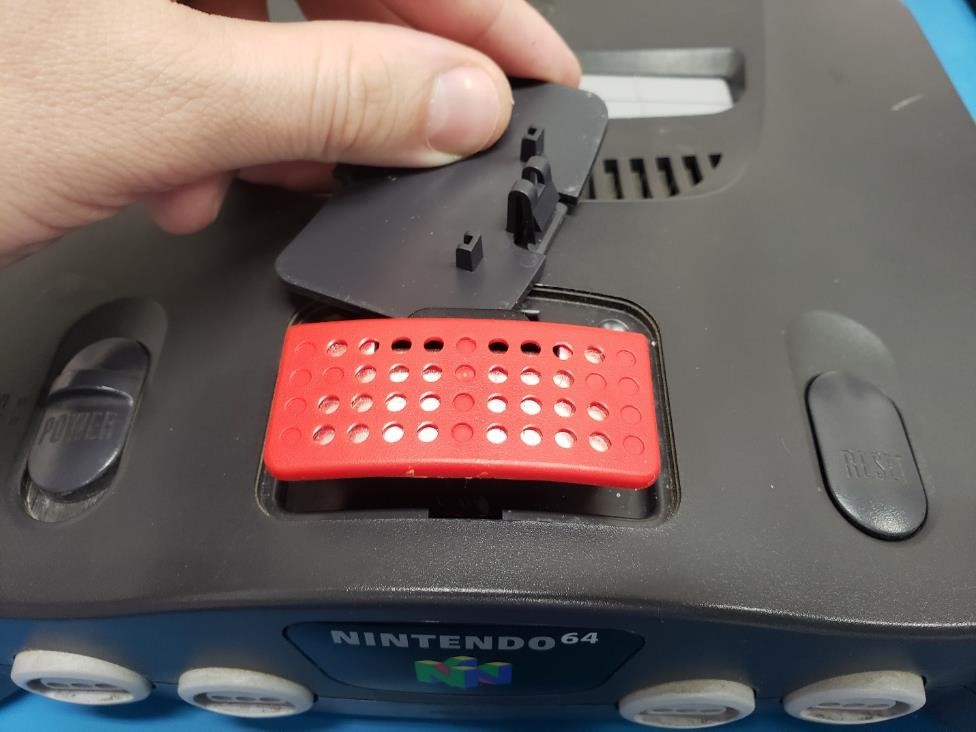
You MUST bend the the metal flap of the bottom RF shield in order to prevent shorting!
DO NOT SKIP THIS STEP! Bend the RF tab inward as this is crucial to avoid shorts!

The installation is now complete! Be sure to check over your work and test before reassembling!
Troubleshooting
“I have no video.”
- Does composite video still work?
- Are you using the appropriate cable?
- Are you using C-Sync? Did connect it properly?
- Do you have audio?
- Did you put the jumper/expansion pak back in properly?
- Did you bend the metal tab of the RF shield in?
- Did you keep the pre-tinned conductors for the vias short?
- Is your soldering clean? Any cold joints or bridging?
“I have video but I'm missing a color or the color is wrong.”
- Did you solder the connections correctly to the N64RGB kit?
- Did you solder the connections correctly to the Nintendo 64?
Disclaimer
The information on this website is provided as is without any guarantees or warranty. In association with the product, Voultar LLC makes no warranties of any kind, either expressed or implied, including but not limited to warranties of merchantability, operational failure and/or damage as a result of end-user installation. Use of this documentation by a user is at the user’s risk.