Table of Contents
SNS-AGP-0X Edge-Enhancer Installation
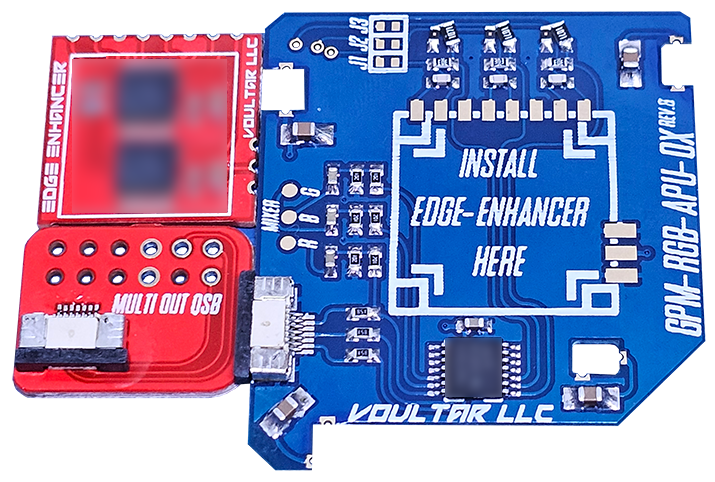
This page will guide you through the procedure of installing the SNES Edge-Enhancer kit into the SNS-AGP-01(2) SNES/SFC revisions. The SNES Edge Enhancer is an edge correction modification that “deblurs” the video output, yielding much sharper pixels without sacrificing video quality. The SNES Edge-Enhancer is also a dedicated video recovery appliance that preserves and improves all video outputs. Electrically, the Super Famicom is identical to the SNES, making these instructions applicable to the NTSC-J (Japan) equivalent. You can purchase the SNES Edge-Enhancer kit from my online shop.
Follow the directions below and have a great time modding!
Before We Begin...
The SNES Edge-Enhancer is ONLY compatible with 2CHIP systems.
This kit WILL NOT WORK with 1CHIP systems.
It is strongly advised to test the SNES with the SNES Burn-In Test Cartridge ROM before proceeding.
SNES Mainboard Identification
The mainboard revision of the SNES can only be definitively identified by disassembling the unit.
The mainboard revision is silk-screened to the bottom right of the cartridge connector. See below:
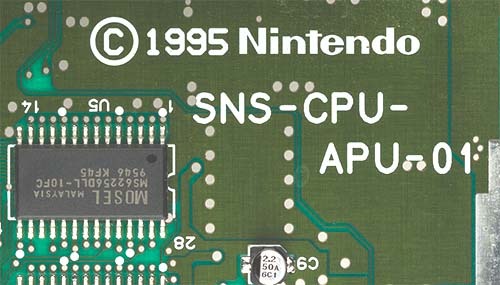
You MUST disassemble your console to verify your SNES revision!
The serial number alone is NOT definitive!
Cap Kit Installation (optional)
If you've purchased a cap kit along with your Edge-Enhancer, please follow the cap-kit installation guide before moving forward with the main installation.
Basic Installation Vs Advanced Installation Steps
Beyond the basic installation method, there are advanced installation steps that you may choose to take.
The “basic” installation method is intended for all users that possess a basic soldering skillset. However, depending on the console, you may or may not experience video distortions such as jailbars and other visual anomalies. The “advanced” installation will give you the sharpest, cleanest video output, while requiring advanced skills such as fine pitched soldering and pin lifting. It's best to install the kit normally and only use the “advanced” installation method if you have an advanced skillset and/or you're dissatisfied with the output quality.
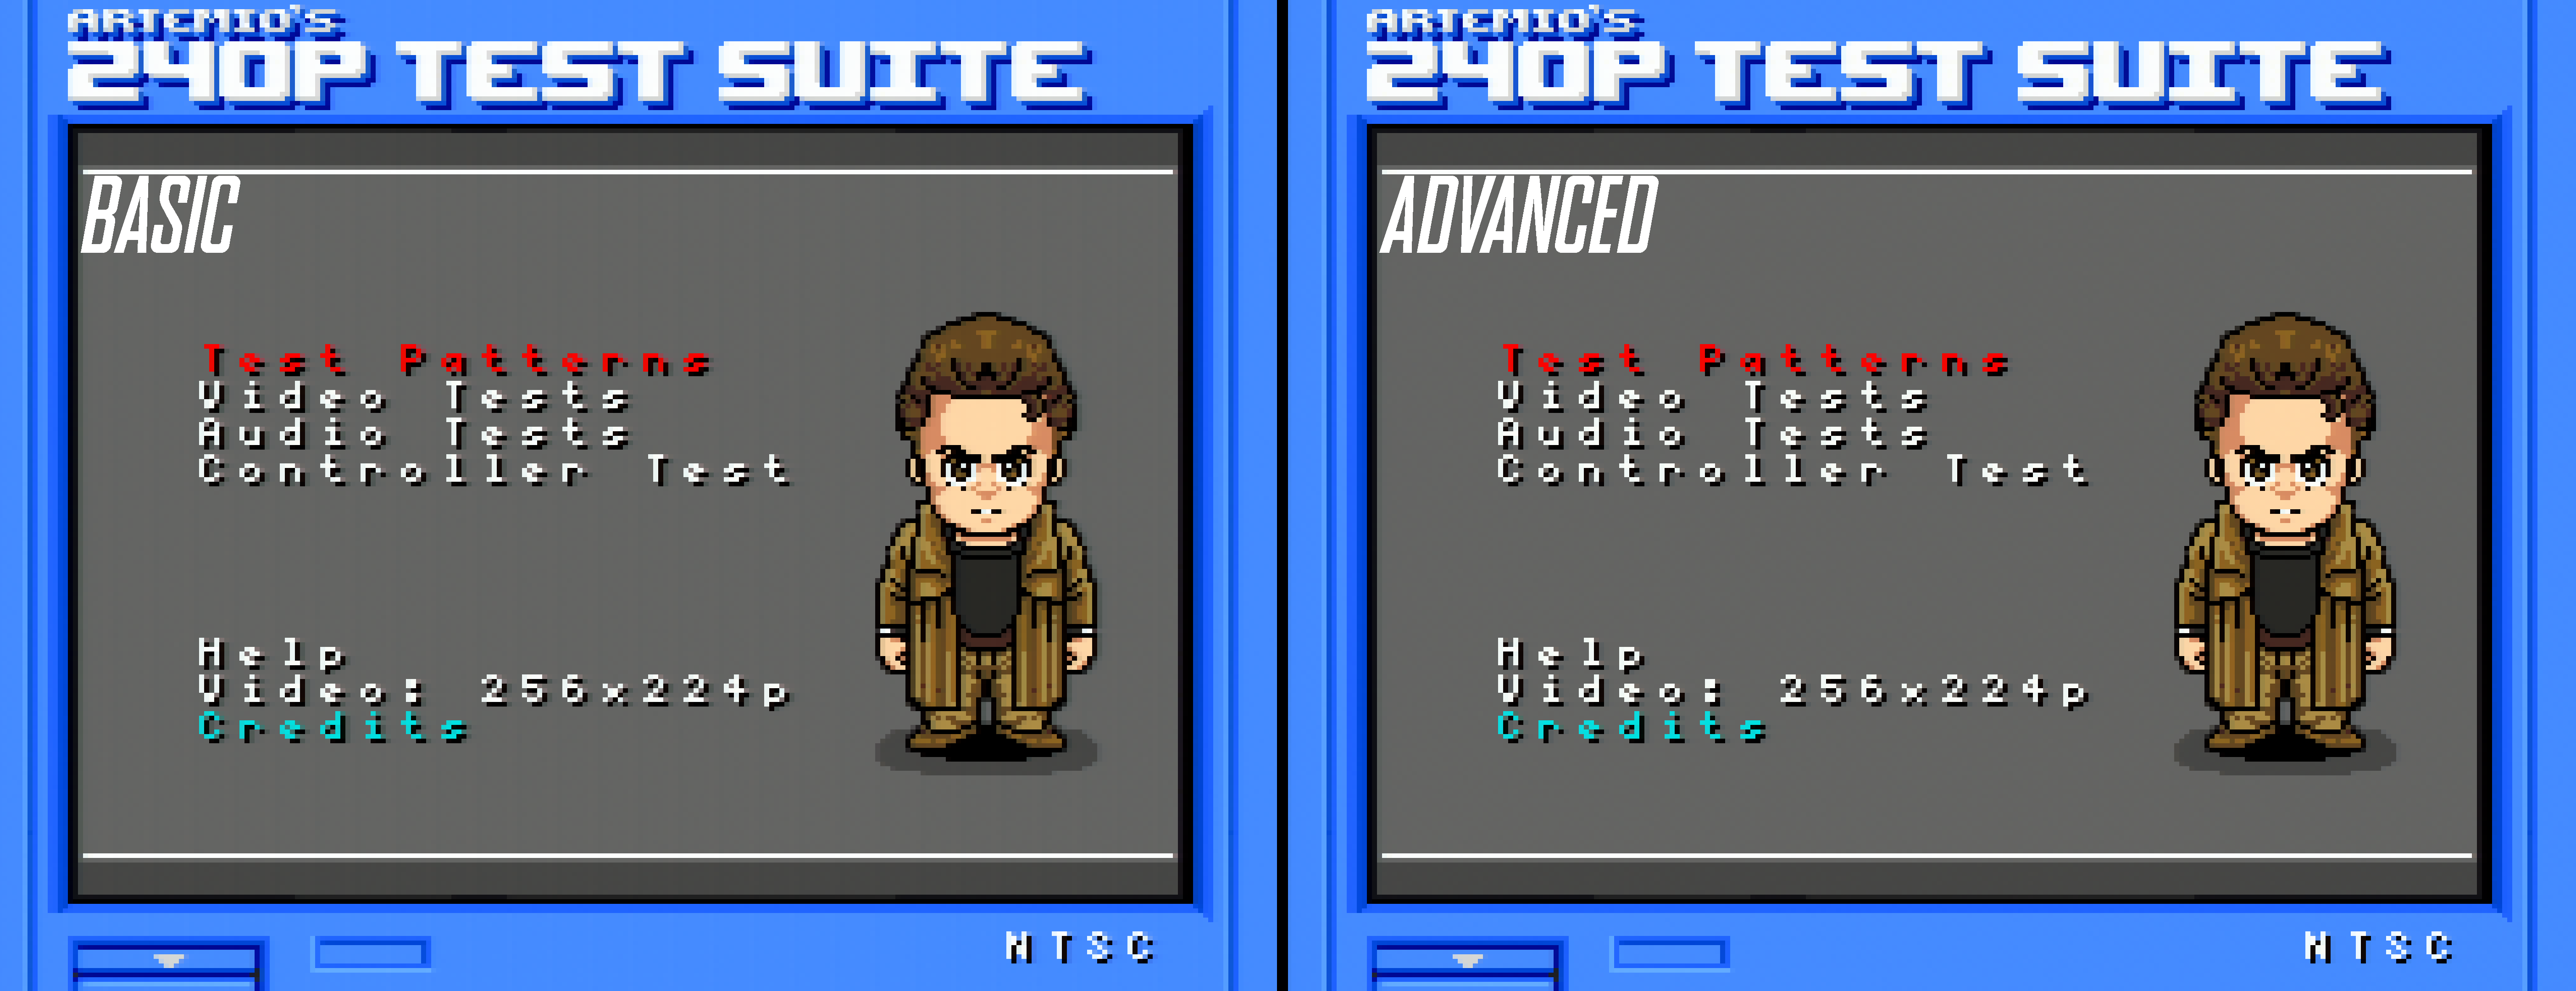
Here's an example comparing the RGB output quality between the “basic” and “advanced” installation methods:
Choose your installation method:
The “advanced” installation requires an advanced skillset.
Do NOT attempt the “advanced” method unless you feel comfortable!
Disclaimer
The information on this website is provided as is without any guarantees or warranty. In association with the product, Voultar LLC makes no warranties of any kind, either expressed or implied, including but not limited to warranties of merchantability, operational failure and/or damage as a result of end-user installation. Use of this documentation by a user is at the user’s risk.